Data Uploading
Box to Internet Wi-Fi connection
This is required for uploading data from the box directly to cloud storage. It's also required for remote connection from the Melbourne team to push updates or diagnose issues.
Turn on the box and connect your laptop or other device to the box's hotspot, the same way the phone would (see Rider Operation).
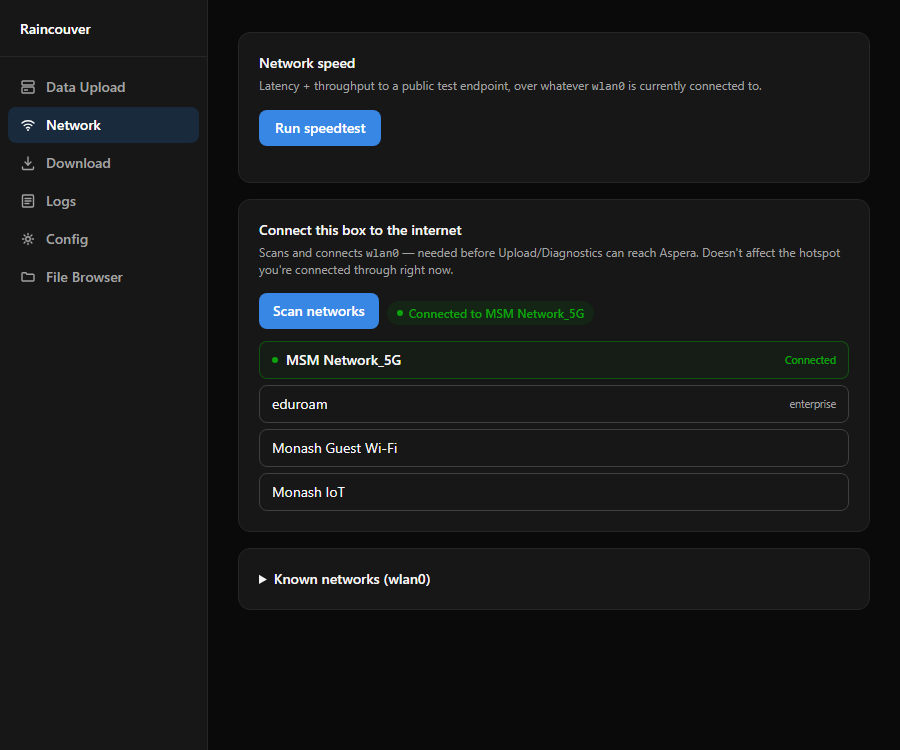
Once connected, go to http://10.42.0.1 — this is the
address for the box's main control interface. Navigate to the
Network tab; from here you connect the box's other
Wi-Fi card to an external Wi-Fi network to give it internet access.
Click Scan for networks and this will show all local Wi-Fi networks — pick the one you'd like to upload via, input the password, and click connect.
You can test that the box is connected, and the speed of the network, by clicking the Run test button.
Uploading the data
Connect to the bike box via the same hotspot the phone does, with the same "datarecord" password.
General note: it's recommended to both plug in the box to charge while uploading, and to delete the data created while it was uploading at the end — leaving it could inflate the size of the next upload.
Uploading straight to cloud storage
Connect to the web app from your device and connect the box to an external internet connection (see Box to Internet Wi-Fi connection above) — it's recommended to keep the box close to the Wi-Fi access point/router to improve upload speed.
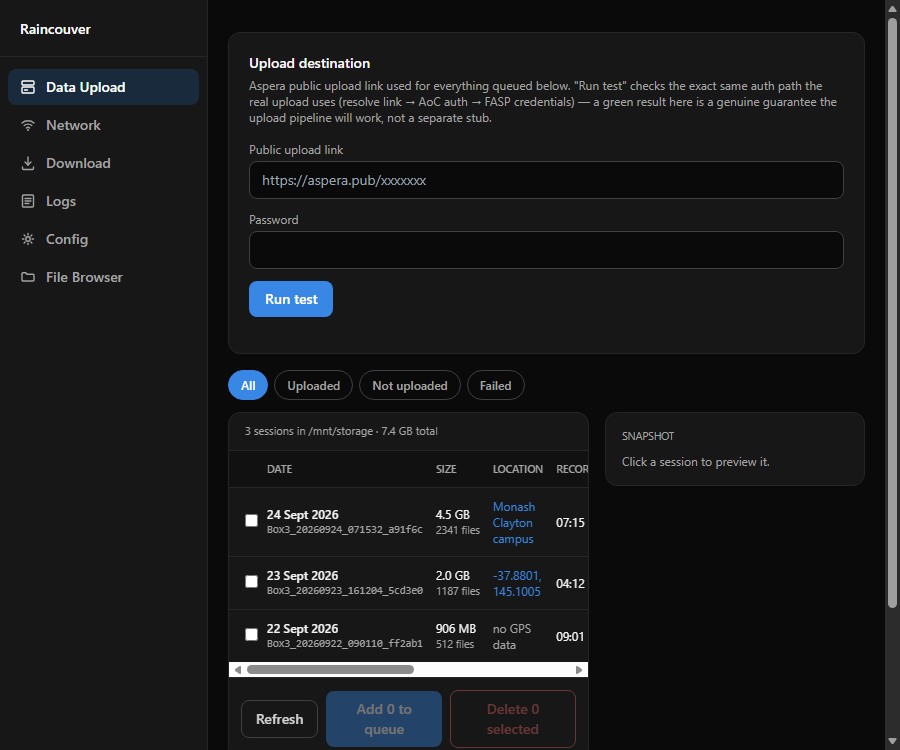
Navigate to the Upload page. Here, input the link and password you were given — this is reset periodically on Monash's end, so that may explain some authentication issues. Contact whoever administers the fleet if you have any issues.
Next you can select the folders you'd like to upload to the server. There's also an option to upload new files only — the web app tracks which folders have already been uploaded/downloaded, so it will only upload folders that are new or not yet uploaded.
Once you've clicked Upload to Aspera you should see the upload process begin, with status information about the transfer. If there are any errors these will be flagged and can be looked into from the Logs page.
Once the upload has finished you can confirm by navigating to the IBM Aspera link you were given and logging in with the password.
There's also the option to download the folders locally (see below) to your device to be saved elsewhere as a backup, e.g. an external hard drive.
Once you're happy that all the data has been uploaded, you can delete the files from the box by either individually selecting them or using the Delete uploaded/downloaded button — this only deletes a folder whose most recent upload was confirmed as a verified success, so it won't remove anything that hasn't actually made it off the box.
Downloading to device — primary method
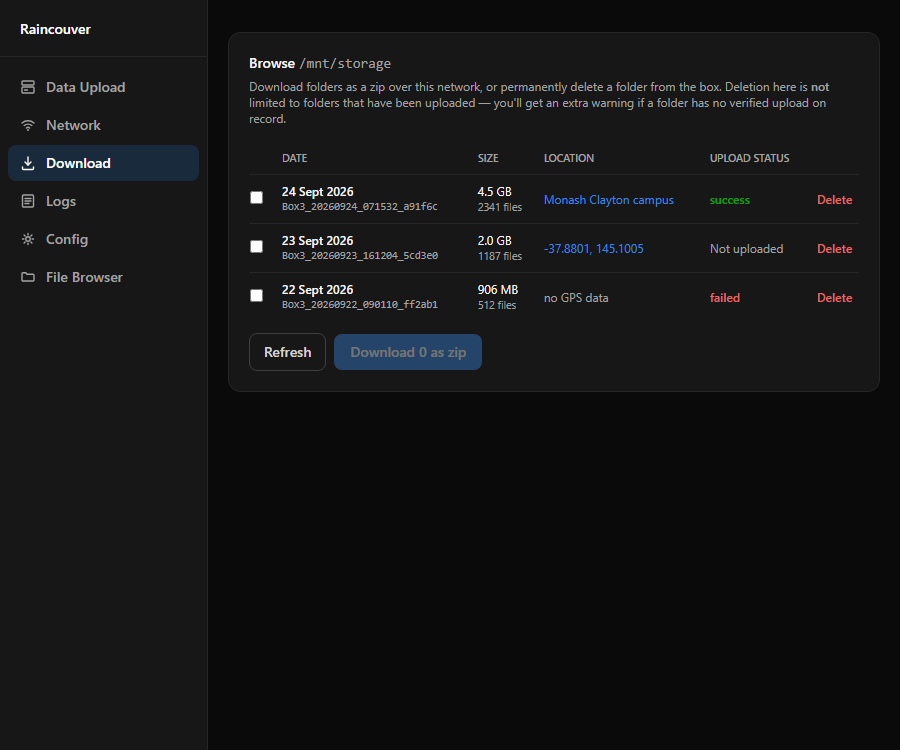
Once connected to the hotspot, go to http://10.42.0.1.
You can select the folders you'd like to download to your device —
there's no need for an external internet connection for this. There's
also an option to download new files only, the same
idea as the upload-side version.
When you're happy with your selection you can download them — the web app zips the folders and downloads them as a single compressed file. The download indicator is for the zipping step; your browser will show the actual download status.
Once you're happy that all the data has been downloaded, you can delete the files from the box the same way as above.
Downloading to device — backup method: File Browser
The backup method uses an online file browser tool which gives you direct access to the storage drive's files. This can be used to download data directly from the box, or delete old folders. It's not as streamlined as the main system in terms of tracking and direct upload, but it can be useful as a backup, or for checking data.
It can also be used for downloading specific segments to check if a session is worth uploading — for example if the box was only briefly turned on while uploading files.
File Browser is linked directly from the sidebar of the box's own web app — no separate address to remember.